Controllers
Shadow Controllers
There are two flavors of controller. These provide exactly the same functionality, but they are setup slightly differently and are designed to support two distinct approaches of creating models within a test engineering application.
The first type, the so called Shadow Controller, supports the case where the model is created and maintained by the test engineer for the given IP block.
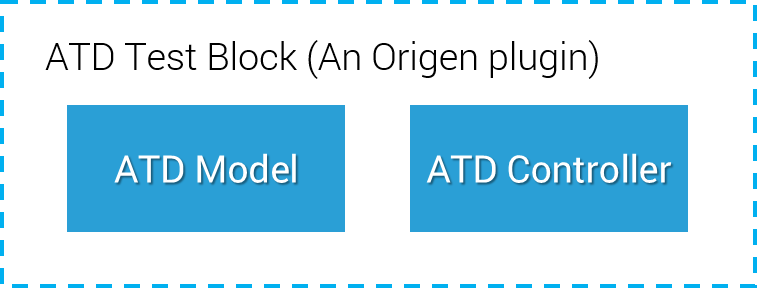
So for example, let’s say we have a test engineer who is responsible for an analog-to-digital converter (ATD) IP, and they have decided to create an Origen plugin which will provide a complete test solution for this IP. This plugin will provide both the model and the controller as shown below:

Here is a simple ATD model implementation which defines some register:
# lib/atd_test_block/atd.rb
module ATDTestBlock
  class ATD
    include Origen::Model

    def initialize(options = {})
      instantiate_registers
    end

    def instantiate_registers
      # ATD control register
      reg :ctrl, 0x0024 do |reg|
        reg.bit 7, :coco, access: :ro
        reg.bit 6, :aien
        reg.bit 5, :diff
        reg.bit 4..0, :adch, reset: 0x1F
      end

      # ATD data result register
      reg :result, 0x0028 do |reg|
        reg.bit 15..0, :d
      end
    end
  end
end
A common thing that users of our test block might want to do is to use it to make the ATD perform a conversion.
Let’s create a controller to provide the user with the following API:
result = $dut.atd.convert(10)   # Perform a conversion on the voltage at ATD input channel 10 and return the result

# The caller can then process the result as they wish, here for example to capture it to the tester
result.store!
A controller is implemented as follows, this is just a regular Ruby class that includes the
Origen::Controller module:
# lib/atd_test_block/atd_controller.rb
module ATDTestBlock
  class ATDController
    include Origen::Controller
  end
end
Naming of controllers can be significant, here Origen will know that this this the controller for the
ATD model since we have followed the naming convention:
<model name>Controller
If you cannot follow this convention (the main reason would be if the model lives in a different namespace), then you can supply the class of the model like this:
# lib/atd_test_block/atd_controller.rb
module ATDTestBlock
  class ATDController
    include Origen::Controller

    model class_name: "SomeOtherNamespace::ATD_M325"
  end
end
The controller now gives us the place to create our pattern API, here is the covert method
implementation:
# lib/atd_test_block/atd_controller.rb
module ATDTestBlock
  class ATDController
    include Origen::Controller

    # Convert the input on the given channel to a digital representation.
    #
    # An Origen::Register::BitCollection will be returned containing the result.
    def convert(channel)
      # Launch the conversion by setting the channel
      ctrl.adch.write!(channel)
      # Wait to complete
      tester.wait(time_in_us: 100)
      # Verify the conversion has completed
      ctrl.coco.assert!(1)
      # Return the result (the data bits from the result register)
      result.d
    end
  end
end
A key point to note from the above is that the controller has direct access to the registers of
the model that it controls, that is you can call ctrl instead of having to drill
down through the global namespace ($dut.atd.ctrl).
Shadow controllers are never instantiated directly, instead Origen will automatically materialize them whenever a new instance of the model comes into being.
atd = ATDTestBlock::ATD.new # Instantiates the model, a controller will also be created automatically
This is where the name comes from, whenever a model is created it is shadowed by a corresponding controller.
So how do we invoke our controller API? We simply call the methods on the model:
atd = ATDTestBlock::ATD.new

atd.convert(10)  # => <BitCollection>
Origen employs some Ruby trickery such that the object assigned to atd above will
respond to the methods available to the model and the controller - models will proxy (send) methods
that they don’t recognize to their controller and vice versa.
Most of the time then, it doesn’t matter whether the atd object is actually the model
or the controller, they will respond the same.
However if for some reason you really do need to deal directly with one or the other then you can use the following API:
atd.model       # => <ATD instance>
atd.controller  # => <ATDController instance>
Such a test block would normally be plugged into a top-level application in order to generate patterns for a target device.
The ATD test block’s integration guide should instruct the top-level test engineer to instantiate the ATD model within the top-level model like this:
# lib/eagle.rb
class Eagle
  include Origen::TopLevel

  def initialize(options = {})
    sub_block :atd, class_name: "ATDTestBlock::ATD", base_address: 0x1000_2000
  end
end
The ATD API provided by the ATD test engineer is now available to the Eagle device’s test engineers:
$dut = Eagle.new

$dut.atd.convert(10)  # => <BitCollection>
If at some point the ATD test engineer gets access to an XML-based or similar definition of the ATD registers from the design team, then the model can be simplified like this:
# lib/atd_test_block/atd.rb
module ATDTestBlock
  class ATD
    include Origen::Model
    include CrossOrigen

    def initialize(options = {})
      cr_import(path: "#{Origen.root!}/ipxact_files/atd_regs.xml")
    end
  end
end
See the Cross Origen plugin for more details on importing 3rd party data formats.
If on the other hand someone comes along and says, “ok everyone, from now on a full IP-XACT representation will be available for every device”, then it would be time to move to a Direct Controller…